Showing posts with label solution. Show all posts

Monday, June 8, 2015

Fifteen minutes of crafting {polka dot clothespins}

Before I left school for the year I quickly decorated clothespins to use this fall. My first year I covered them in decorative duct tape. That was a pain. This year I just wrote had Niki write my kids' names on them in colored sharpie. That wasn't near enough fun. So for next year I decided I was going to paint them polka dotted! 
It was super simple! I used regular paint from school and an unused pencil.


I made sure to make some of my dots whole and some going off the edges so they looked like "real" polka dots. I let them dry for an hour or two then flipped them over to do the other side.
*Side note* I had them numbered with colored sharpies before I did the polka dots.  My plan is to reuse them, but we'll see how they hold up.
 
What DIY projects are you working for home or school?


Monday, June 10, 2013

Finishing My Corner cubbies


I'm back to finish up my new cubbies in the corner that I used to replace my desk. After putting it together and popping it into place I started filling it up. Actually first I started sorting out all the stuff that needed to find a new home in each of the cubbies.

I grabbed these cubes at Target in the dollar spot. They were $3 each, which was awesome compared to the $6-12 price tag on all the others!


This little tray made the move from the desk to the new area. I love how it displays all of the cheery colored office supplies.


And here it is all filled up!  I like this soooo much better than that silly glass corner desk. It looks like it actually belongs there and isn't just a desk stuck randomly in the corner of the dining area!


Here's a closer peek at each space, left to right.


I also snagged these clear file boxes at Target for less than $3 each.


Thursday, June 6, 2013

Operation Get It Together continues...

Move That Desk!! (clearly that was yelled Ty Pennington style) Next up in my mission to declutter my life, both mentally and physically is the desk area. It's this little disaster in the corner of my kitchen. Awhile ago we basically switched the desk and the dart board. And by we, I mean me. Yep moved that full sized dart board all by myself. But then it left the desk looking all weird in the corner.


So I decided the desk had to go. I don't think I have sat at it more than 5 times to actually use it as a desk. So there was no great loss as far as desk surfaces go. The obvious lack of storage was probably what lead to its demise. 

Which leads us to step 1.
Wait three days for boyfriend to move the desk to the garage. We live in an apartment so its not like just moving it out the door, it has to go quite a ways.

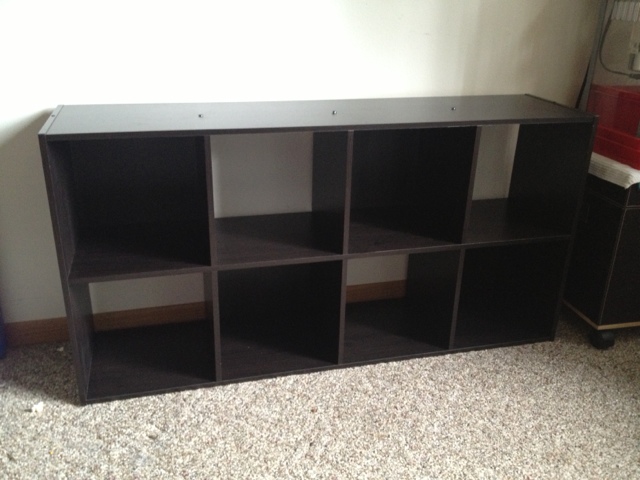
While you are waiting for said boyfriend to move the afore mentioned desk. Go to target and buy a cute little cube-y deal. Bonus points if you score it on sale like I did! Mine is made by Closet Maid, but I don't think the brand really matters for these friends.

Step 3. After the waiting period has passed and desk has been successfully removed, you put that baby together!! More bonus points if you can do it hillbilly style without a hammer! More points for most creative non-hammer tool used.


Then we wait, because here at our little blog we are realists and we don't have time to spend 4 hours creating a wonderful new corner area like we would like to. So this is a multi-day, multi-step process. But I am giddy about it already and I haven't even started filling it up yet!! I'm also glad to finally be doing a "real, hands on" project for Operation: Get It Together!


Thursday, May 2, 2013

A Pinteresting Solution

Since I took down my Christmas decorations I have been dragging my feet on getting this sign hung up. I really didn't want to take the time to measure and put in nails only have them not be in the correct location and end up getting up and down from my chair like seven times. And then I found this idea on Pinterest. Mark the places for the nails to go on a piece of tape, and then put that tape on the wall and put your nails in. Genius, isn't it???

The only tape I had handy was duct tape, so that's what I used. I put it along the top side of the back.

 Then I used a marker to trace where the hooks are, so I could put my nail in the correct place.


 Then all I had to do was stick my tape up on the wall quick and make sure it was centered. I popped my nails in quick and pulled the tape down.


And then my sign went up, nails in the right spot, and already centered. easy peasy.


Here are the very high-tech supplies I used. Yeah, I know normal people use a hammer. I don't think one ever made it to the apartment when we moved, so this baby worked just fine. However when my daddy was over the other day to install my new dryer (some of you may have caught that on instagram) he was quite disapointed that I didn't have 1. a hammer and 2. my tools and other items were in a cardboard box. He clearly thought I needed a real toolbox. So I reminded him that the cardboard box just so happened to be right in my price range :)


So pinterest fixed the silly open space left by the absence of my Christmas decorations. What brilliant solutions have you found via pinterest?