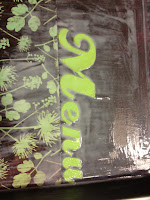
{This is our first diy post, so please forgive the terrible Iphone photos}
Step 1:
I started with a few simple supplies.
* a baking sheet (from the dollar store)
* magnetic strips
* wooden clothes pins
* pretty scrapbook paper
* mod podge
* foam brushes
* ribbon (for hanging)
*paper cutter or scissors
Step 2:
I began by measuring my baking sheet and
cutting my paper to fit inside.
Step 3:
Begin mod podging! I coated the pan and then the
scrapbook paper and then let that layer dry.


 Step 4:
While you are waiting for your mod podge to dry, you can begin cutting strips of paper to put on your clothes pins.
Step 5:
Add a layer of mod podge to your clothes pins, both sides of the paper. Allow them to dry.
Step 6: If your mod podge layer still isn't dry move on to making your pockets to hold the menu items. I used a leftover piece of scrapbook paper. I folded it in half leaving the open edge in line when the edge of the laminating pouch. I ran it through my handy laminator and ended up with two little pouches.
Step 7:
Add more mod podge layers to your baking sheet and to your clothes pins.
You can then begin working on the tags that your menu items will be written on. I found mine on better homes and garden's, but you can make your own also. Run them through the laminator, and cut them apart with your paper cutter.
Step 8: Add magnetic strips to the back of your clothes pins, and the two pouches you created. You can also add another layer of mod podge for durability if you like.
Step 9: I added the word "menu" to mine, you can do the same or add anything else you would like at this point.
Step 10:
I used ribbon to hang my menu board, so I just hot glued two strings of ribbon to the back of the baking sheet and hung it on a nail on the wall.
The finished product:


No comments:
Post a Comment